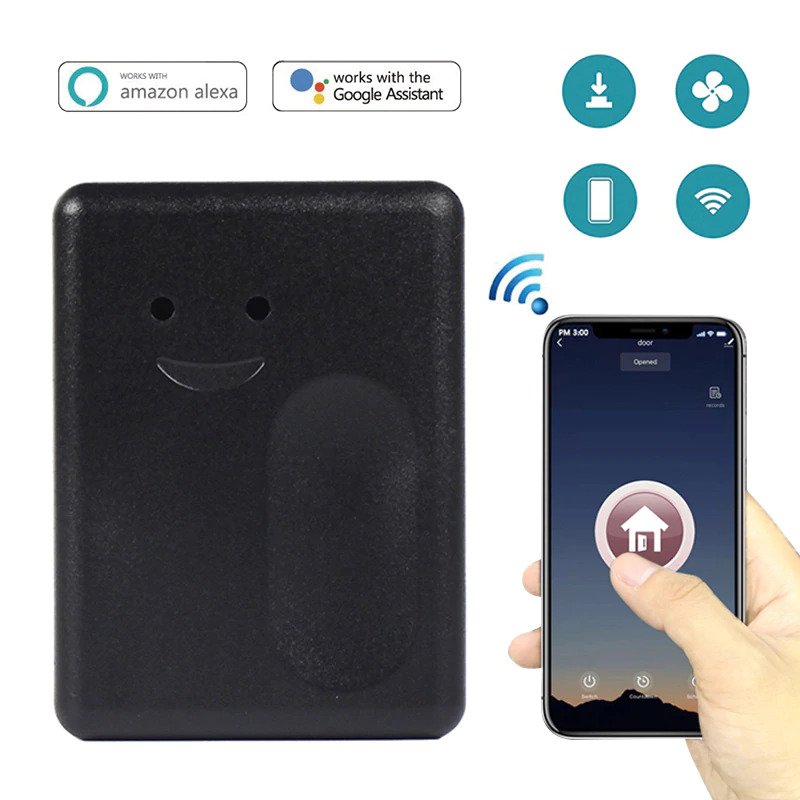
I recently purchased some EWELINK wifi garage door openers and my plan is to get them working with Apple Homekit via Homebride.
Edit: Removed link as everywhere that sells them goes out of stock then the link 404s. This is what they look like you can find them on eBay and other similar sites.
If you don’t know about HomeBridge it’s basically the missing link between all your IOT devices and Apple Homekit. It allows you to use non-home kit devices with home kit. Albeit you do need some technical knowledge to get this working and it’s not for the faint of hearted.
The are various guides floating around the web involving the use of anyproxy and tuyapi/cli -but they don’t work anymore.
The best way I’ve found to intercept the ID and KEY is using Burp Suite its an excellent piece of software and the community edition is free.
- Download Burp Suite Community Edition
- Install
- Launch Burp Suite
- Click on Temporary Project
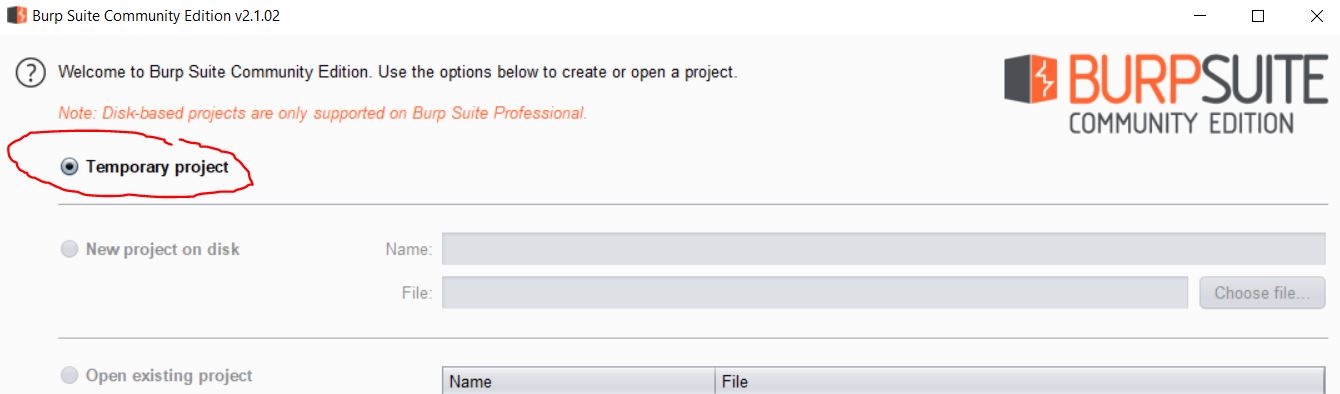
- Click use Burp Defaults

- Once started click on the Proxy Tab, then Options tab, then add a new proxy listener
- Make the port 8082
- Select “All Interfaces”
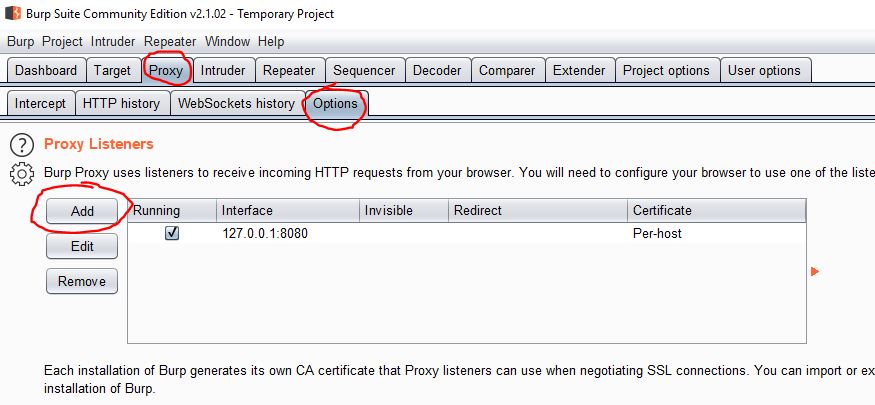
- save the listener
- Accept the warning
- Click on the Intercept tab
- Turn intercept off
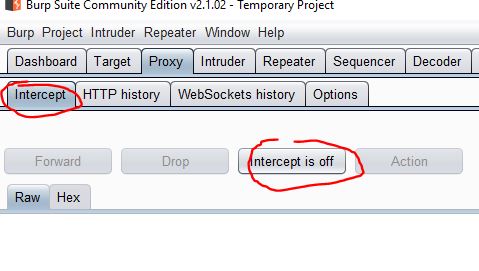
- Click on HTTP history
- Now on your iPhone make sure you phone is on the same network as the computer you are running Burp Suite on (mandatory)
- Open the iPhone wifi setting and click on the blue (i) next to your wireless network
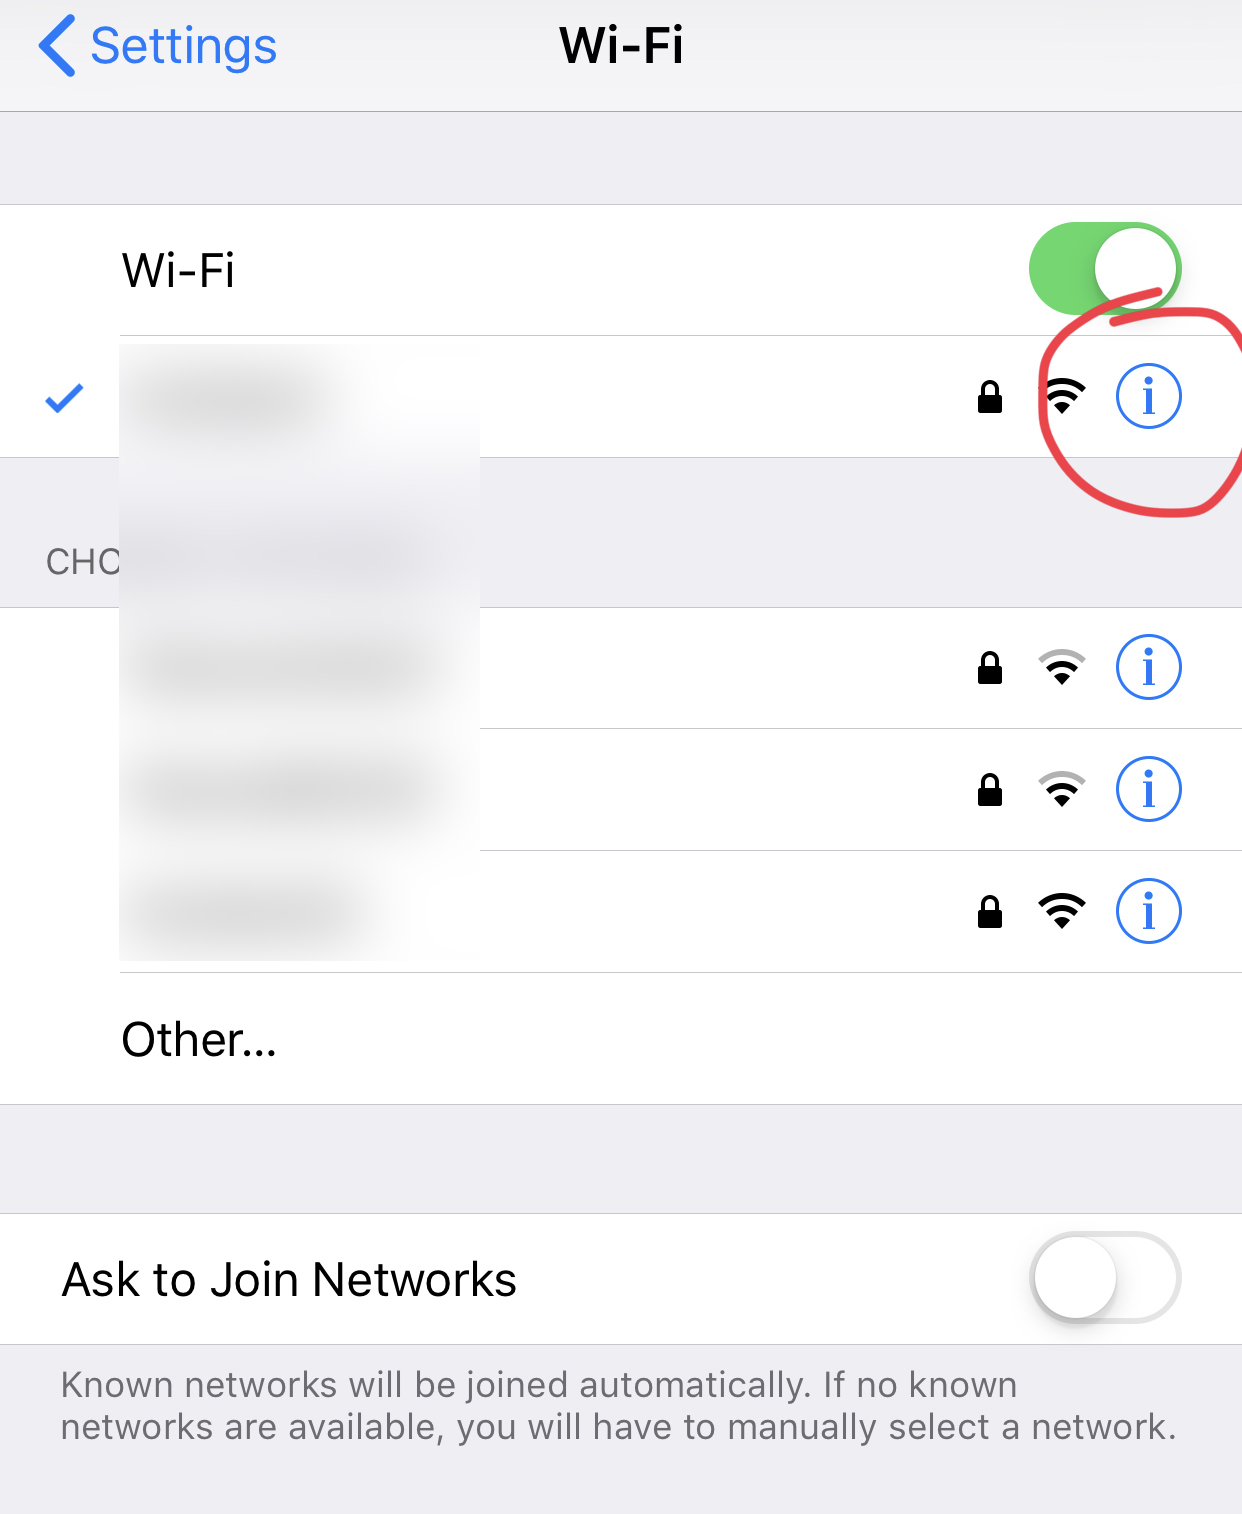
- Then scroll down to proxy settings / Configure proxy
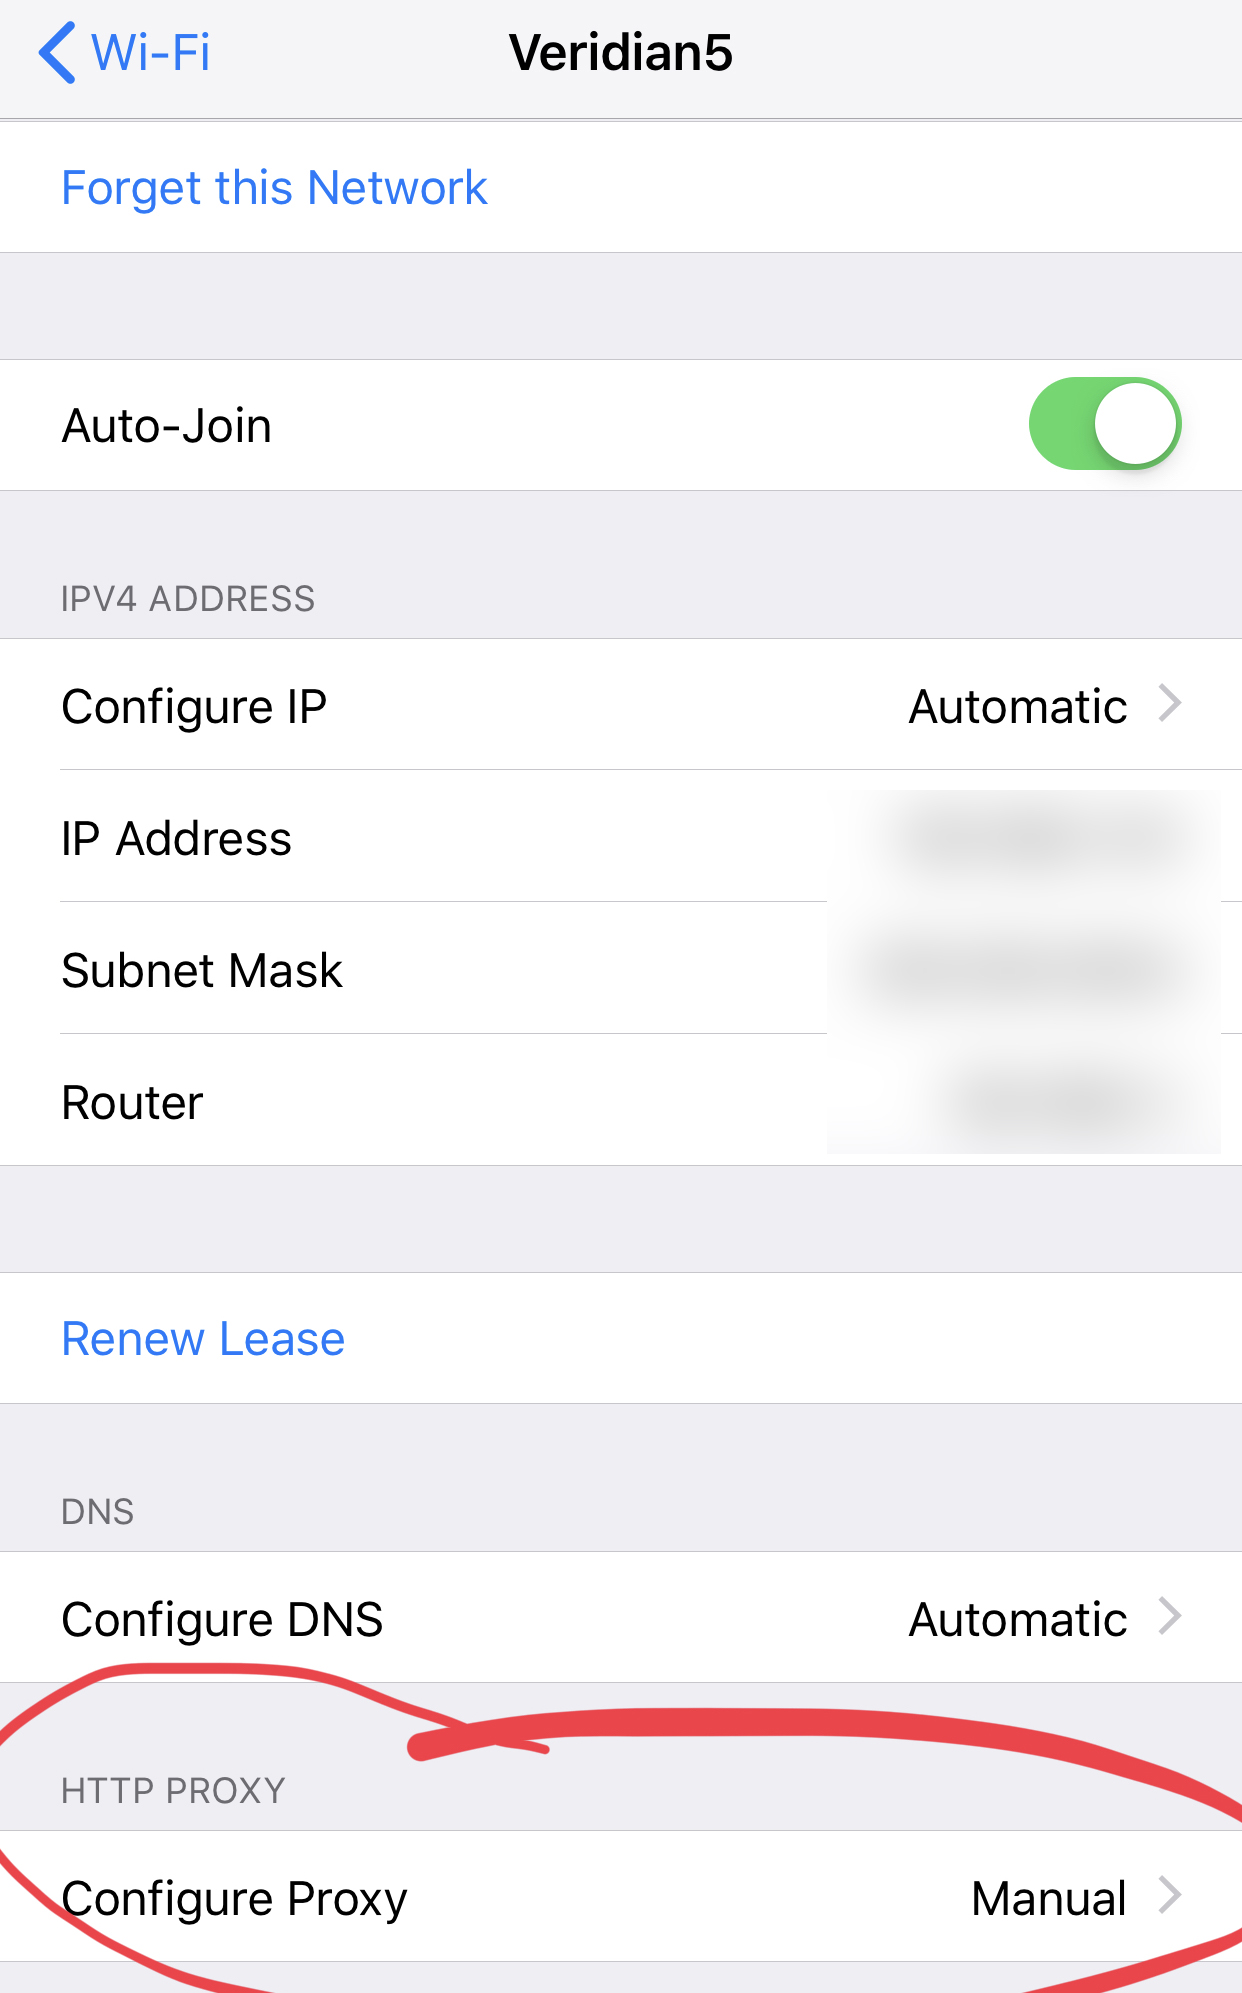
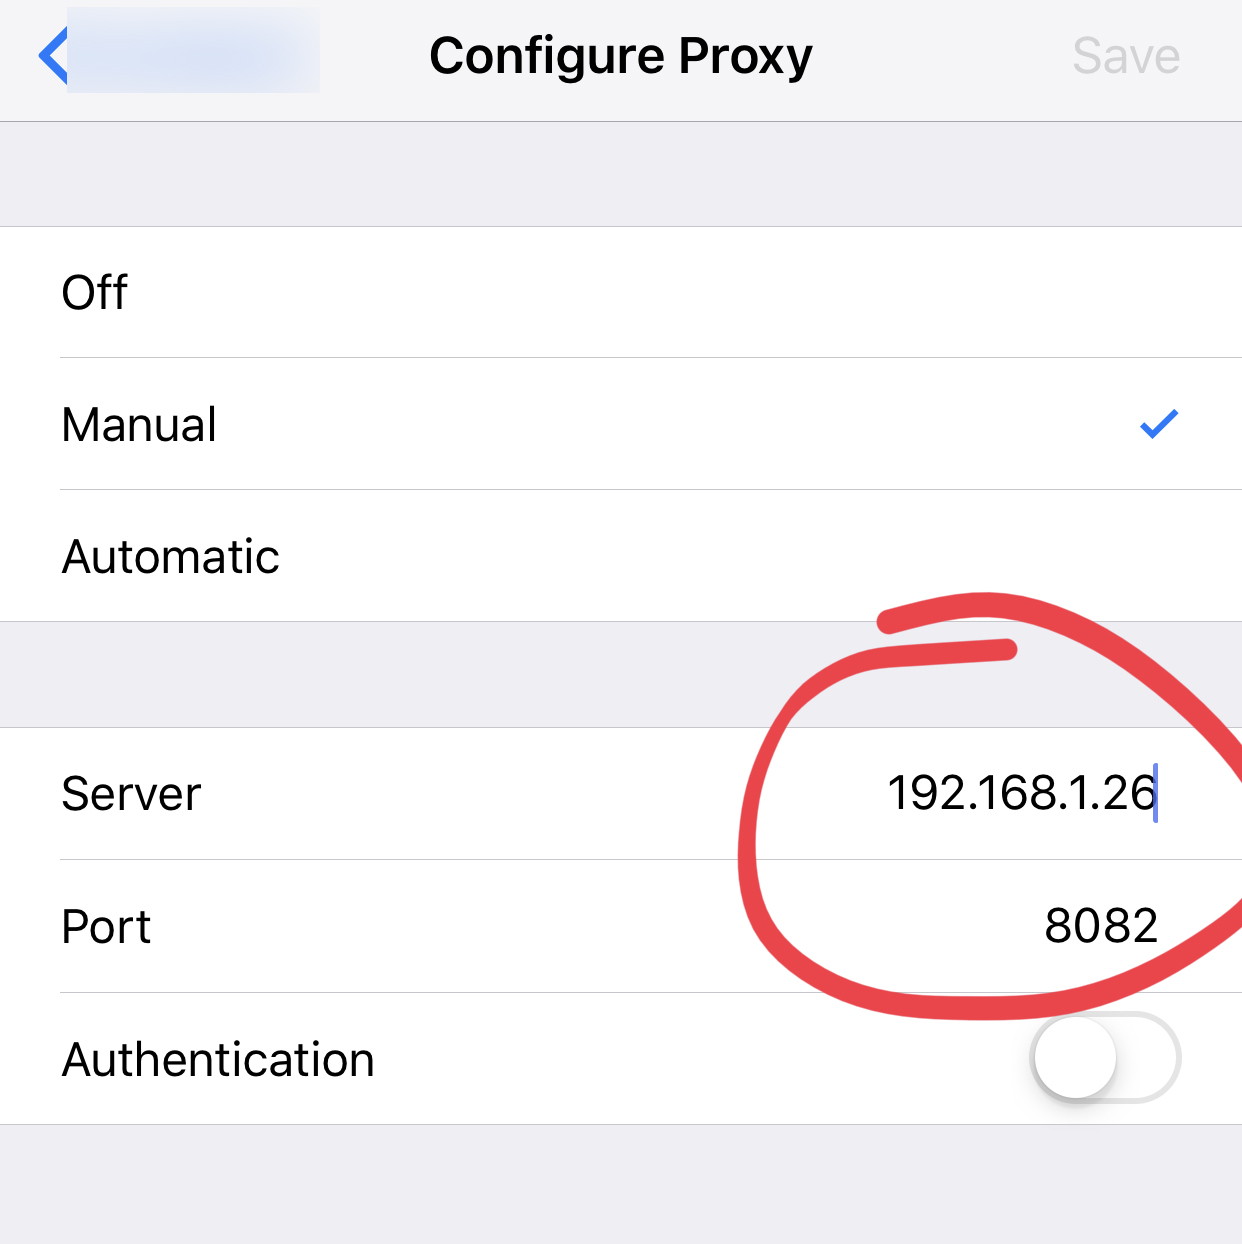
- Select manual
- Enter the IP of your computer running Burp Suite and enter the port as 8082
- Remember where this is as you will need to turn it off later in order to get Internet access back on your iPhone. Once you are done with this process you simply come back to this menu and turn the proxy off.
- Now you should start to see some requests streaming through to Burp Suite from your phone. Currently, all SSL requests won’t be visible as you need to install a certificate.
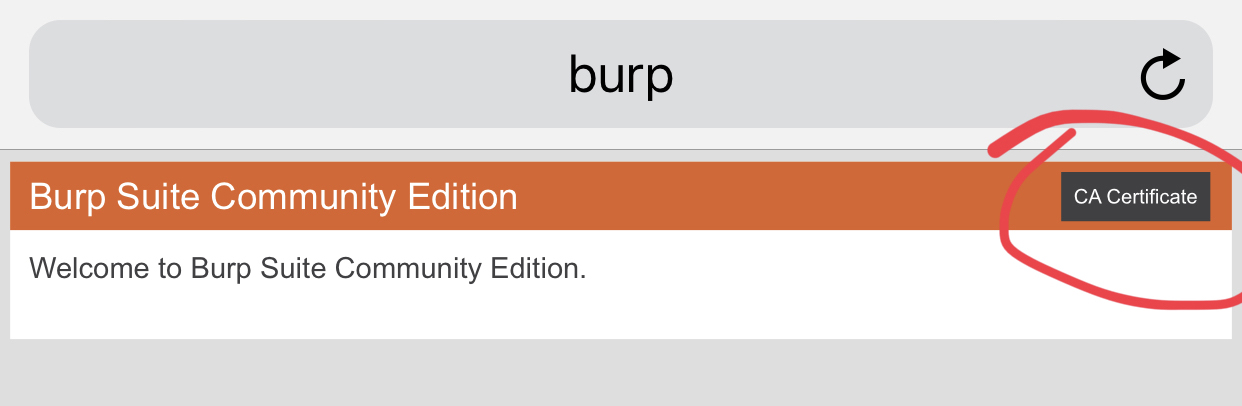
- On your, iPhone browse to http://burp
- Click on CA-Certificate in the top right
- Click allow
- Choose iPhone if you are prompted between iPhone and Apple Watch
- You will see a profile downloaded message
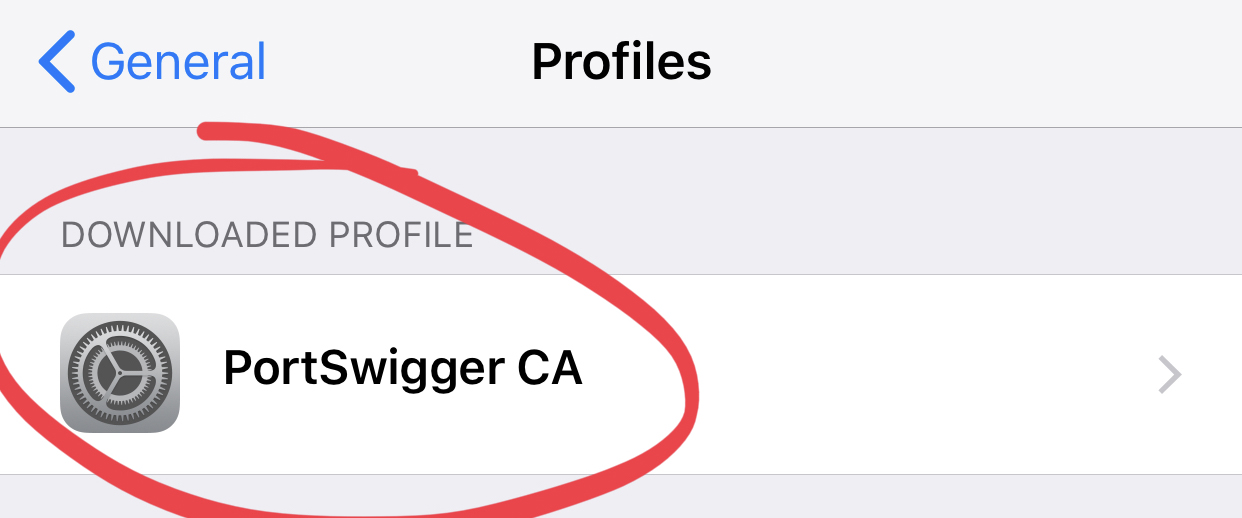
- Now go to Settings > General > Profiles
- Click on PortSwigger CA
- Click Install and enter your passcode (note, this is not sending your passcode to anyone it’s simply Apple confirming you are definitely the owner of the phone before you install the certificate on it, this is to protect against someone getting your phone and installing a monitoring profile when you aren’t looking)
- The certificate will now be installed
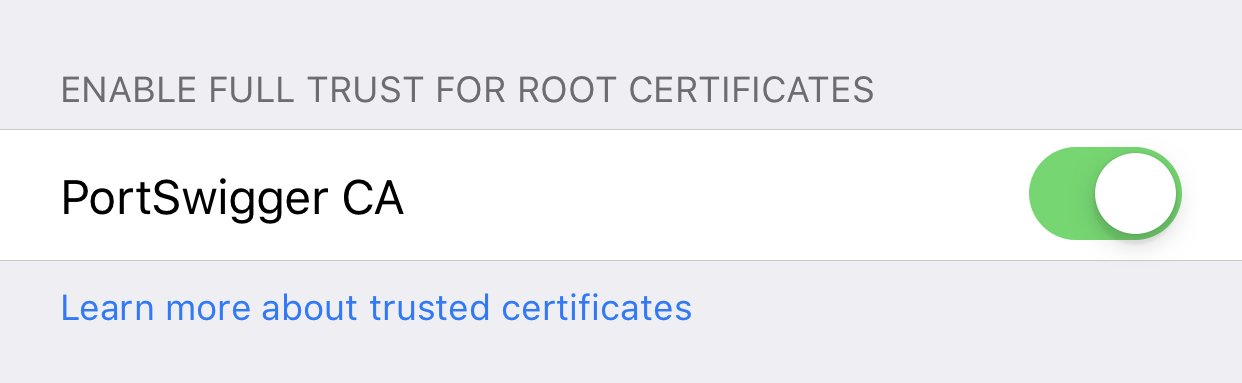
- Go to Settings > General > About then scroll down to Certificate Trust Settings
- Switch Portswigger CA ON
- Now you will be able to see SSL requests and responses streaming through to Burp Suite
- Now open your TuyaSmart or other supported app and swipe down to refresh your devices
- You will see a whole bunch of requests/responses captured for a1.tuyaeu.com (or similar depending on your region) you will need to start going through all of them clicking on “response’ and “headers” tabs until you see one with a JSON structure outlining all of your devices.
- The two elements you are looking for are:
- devId and localKey
- Extract the value of devId and localKey and these go into your confirmation for the homebridge module https://github.com/AMoo-Miki/homebridge-tuya-lan
Cleanup
- Go to iPhone Wifi Settings
- Scroll down to proxy settings / Configure proxy (if you don’t do this you won’t have any Internet on your iPhone)
- Turn the proxy off
- Settings > General > Profiles
- Delete Portswigger CA
Is this still valid? I tested it today and retracted the info but could not find the localKey 🙁
BR // Fredrik
No longer seems to work.
Looks like Tuya switched to https, so this can’t be done anymore as far as I have experienced. I am able to see other non-https traffic and JSON objects from other apps on my iPad just fine, but requests made to a1.tuyaus.com:443 can’t be read (I still learned a bunch with this experiment, though!).
Hi,
Is there another method the retrieve the localkey of a tuya device?
Best Regards,
Ron